

Flex Screen DIY
Flex Screen DIY how to build your own flexible LED Display
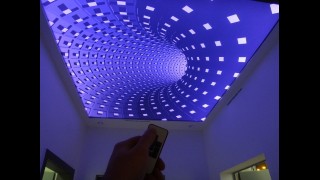
DIY How to build your own flexible LED Display Curtain XXL P16.6 realtime Video Transmission
Here we going to show you how to build a FLEXIBLE "ROLL AND FOLDABLE" LED Display WS2811. cheap easy and very useful Advertiser
TOOLS .:
Side cutter (sharp)
Screwdrivers mix (cross, slot, big & small)
Hot Iron (sharp tip)
Solder (thin)
Heat gun shrinkable tubing Puncher (to hole the Plane)
Detergent (cleaning)
First buy, order, collect all the needed Components for this Project, the most accessories are Optional means they’re modified for my project you can change the accessories like color of the PCBA waterproof or non Waterproof of the led strip IP65/IP68/and more, for this project we use an LED WS2811 realtime Video Controller LED Live transmission controller, The Surface you can change to different materials or colors. We are useing here an PVC Banner Flexible, robust, easy assembling, nice look ...
We offer all the accessories and assembling parts for this project and many other LED projects (TOP PRICE TOP QUALITY incl. WARRANTY) so we will assist you for questions and Price inquires.
WARNING = BE AWARE OF CHEAP CRAP LED STRIPS (low price)
THERE ARE A LOT OF SCAMMERS ON THE MARKET HERE USE REFURBISH CHIPS SECOND HAND IC´S SECOND ASSEMBLY PARTS AND MORE:::
THIS WILL CAUSE A LOT OF FAILURES AND SHORTER LIFETIME
Assembly Parts.:
Surface (depending on your need flexible or fix)
LED Supply
Power Supply´s (5v depending on qty of LED Source)
http://www.elektric-junkys.com/index.php?route=product/product&product_id=52
Controller (Life transmittion controller)
Fast
Connectors NO NEEDED ANYMORE WE SOLDER ON YOUR REQUESTED LENGHT
Shrinking Tube ( to cover and protect your connections)
for free tell us if you want us to send you some Meters for free by
so lets start ....
step. 1
make your assembling parts &
tools ready
Cut 2cm shrink tube pieces (for the soldering place calculate 2pcs each line)
Cut the connection bridge wires for each line
Cut shrink tube pieces cover it over your wire connection (use the heat gun to make them tight)
Cut your Power +red and ground wires you need (for the controller and for the Power supply)
remember for this project WS2811 we need each 8thmeter a new CURRENT supply
60leds mtr 120leds 2mtr 1Line, 480pcs LED´s you can calculate the watts depending on your LED supply
Connect your controller create the CBX file (support questions) and connect 3-4 lines first and test if "anything is working or shining you also can use the SD card of the realtime controller to see if it runs ..
Step. 2
Calculate the length of the LED strip
you have to cut, depend on your final requested LED DISPLAY SIZE !
include the vertical distance of each string line into your calculation
Example. how do i calculate LED strips for LED Display, how to caculate LED strip lines for display =
Strip Length , Strip width + your customized distance of each string. Means
if you want to build a 1000mm high display go on like that. 1000 / strip width + distance = how many strip lines you have to cut /5000mm is one roll then you know exactly how many rolls of WS2811 LED Strip you need for your project !
Now you’re able to cut your calculated numbers of LED strings on your requested length.
Now grab your prepared bridge connection cables and place them on your strings ,
use the hot iron to soldering one by one bridge wire to strip don’t mess up with the the input and output of LED strip take care on the arrows
Soldering the strips in a series circuit means the start of the first strip is every time INPUT, you can start everywhere you want with the INPUT but later in the software you have to change or setup your PORT. !
Don’t forget to cover a short 20mm pcs shrink tube over the strip before you soldering the wire otherwise you have to remove the solder again and cover the shrink tube it’s easier to cover them before. pull the shrinkpiece far enough inside that the heat will not shrink him to early .
After use the heat gun you should bring the strip lines and the connecting wire in ENDPOSITION hold it by hand till the shrink tube will become cold and tight, you can form it as you like, after some seconds it’s tight and will not move again stay in position. !
Place your LED strip construct to the surface.
BRING IT IN POSITION use the meter stick to fix each distance that the strip construct later Placed well in exactly the middle of your surface.
Now you can fix the first LED strip line peel the paper from the backside of the strip (glue), hold one side to the up and start from the other side to fix it.
Use your meter stick or caliper to recheck if your strip is straight in position..!
IMPORTANT.: If you start to place the first line awry the deviation in the end will be much bigger and later show each awry placements and BIG deviation.
Use the Puncher to place a little hole EXACLY under the start of the LED strip Input, put the input wire through the hole. Place the SD controller on the backside of the surface by adhesive tape double sided, connect the wires from the input with the SD controller, connect your power supply and you’re done.
Thanks
for watching....

30LEDm Flexible LED Strip DIY Screen KIT WS2812b-WS2813
This Flexible LED DIY Screen KIT P30 comes with all Components necessary to establish an Flex Screen..
$499.00
60LEDm Flexible LED Strip DIY Screen KIT WS2812b-WS2813
This Flexible LED DIY Screen KIT with 60LED/M P16.6 comes with all LED StringsFULL PART KIT for 1000..
$799.00