

LED Floor Tiling DIY
How to LED floor tiling system DIY make your floor interactive Aluminum LED Light tile bar profile Alutrack
Here we are going to show you how you can build your own Interactive Tile Floor. Cheap easy & professional with Spare Parts from elektric-junkys.com
REQUIRED TOOLS LIST.:
Machines.:
- circular saw "for Alutracks, handsaw also possible"
- Tile Cutting Machine "or Angle Grinder with Diamond Blade "
- Mixing Paddle "for tiling adhesive"
Hand Tools.:
- Spirit Level Aluminum 500mm and 2000mm to level out the Adhesive
- Dental Spatula "Tile Adhesive Comb", Simple Spatula,
- Ladle to apply and level the adhesive
- Standard Sponge
- Grouting Float 220mm X 100mm
- 1-2 Bowls "one for water one for mix tile Adhesive "
- Side cutter (sharp)
- Screwdrivers mix (cross, slot, big & small)
- Hot Iron (sharp tip)
- Solder (thin)
- Heat gun & shrinkable tube all available in our shop
- Detergent (cleaning)
Material.:
- Floor Tiles "decide Wise!!" "shops and Public areas need "NON SLIP TILES"
- Floor Tile adhesive "please check on your local Store for matching with tiles"
- Floor Primer
- Alutracks from our shop.elektric-junkys.com
- LED KIT from our shop.elektric-junkys.com
- Matching Power for our LED KIT
- "WIFI SYSTEM IF WANTED" optional get in touch with us
- Grout to fill the spares on tiles
First buy, order, collect all the needed Components for this interactive floor tiling Project, most of the accessories are Optional.
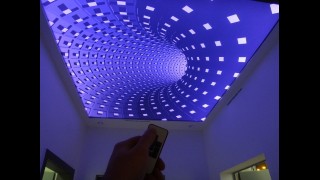
Means they’re modified for our project you can change the accessories like color of the PCBA or the PVC cover waterproof or non-Waterproof of the led strip IP65/IP68/and more, for this project we use an LED LPD6809 Chip System with an Ordinary 120 Programs controller the Kit is available on our shop. There is of course a Possibility of WS2811/WS2812b or WS2801/WS2802 to control several Areas in a Disco Bar or Club. We are using here a PVC robust, easy assembling and cutting, nice look, 30% Milky and 75% Milky depends if you want to see the Pixels more or less clear!
We offer all the accessories and assembling parts for this project and many other LED projects (TOP PRICE TOP QUALITY incl. WARRANTY, SHIPPING BY DHL EXPRESS 3-6 DAYS) so we will assist you for questions and Price inquires.
WARNING = BE AWARE OF CHEAP
CRAP LED CHIPSETS (low price>low quality)
THERE ARE A LOT OF SCAMMERS ON THE MARKET HERE USE REFURBISH CHIPS SECOND HAND
IC´S THIRD PARTY LOW Q. ASSEMBLY PARTS AND MORE:::
THIS WILL CAUSE A LOT OF FAILURES AND SHORTER LIFETIME > Headache
Assembly Parts Order List (Links)
----COMMING UP SOON ---
So let’s start....
Step. 1
Make your assembling parts & tools ready
Make sure that your floor is completely "leveled" proof it with your aluminum spirit level at least 2000mm length depends on Work Area.
If your Floor is crooked and not straight prepare it with "leveling ground" add the lev. ground to a bowl add water and mix it the mass should be a mix of fluid and thick, just tip out the fluid on the floor, remember it should flow in all the crooked and broken floor areas close holes and slices. !
Then Let it Dry for at Least 10hrs depending on your thickness ... normally we say DRYOUT TIME per cm (10mm) a Week!
Step. 2
Make sure the floor is completely FLAT after the filling nivilation "Sanded Smooth" use Scratch Paper to remove ANY irregularities. After the Floor is dry completely leveled and scratched ready for floor tiling , Use a Paint Roll and roll on your Ground Fluid like we did in the Video... let it Dry again for 1 Day (2:10 min)
Step. 3
Now all should be Dry and Flat Smoothed and Straight!
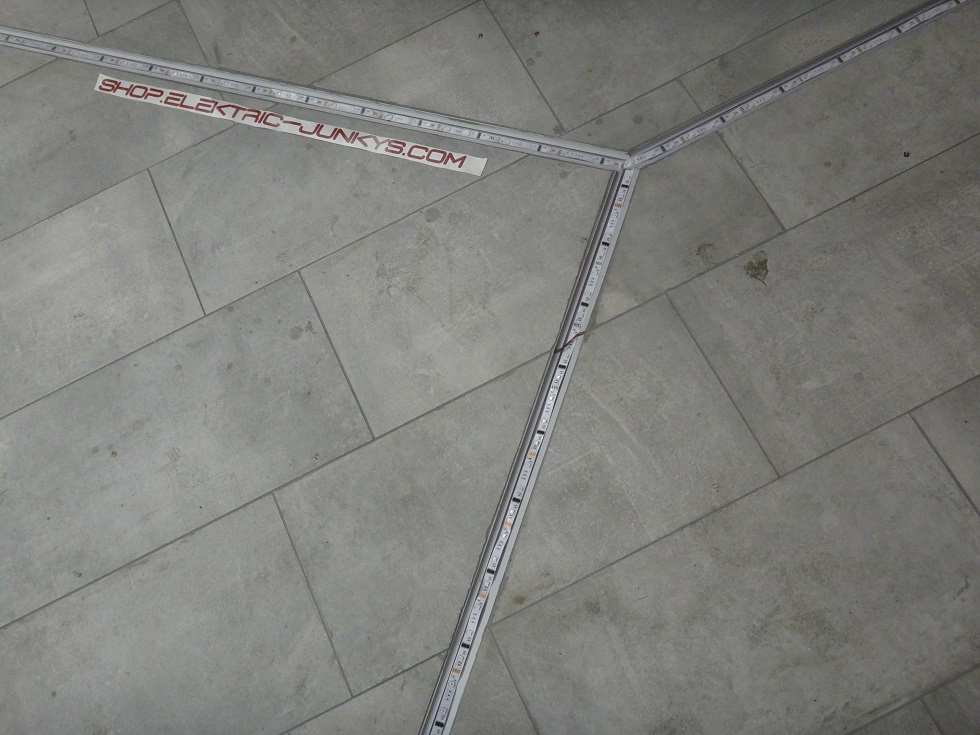
So let’s think about our coordination of the Alutracks
Make a hand drawing, or on PC, ask your GF, Let your Wife Decide or ask your Mother whatever ;)
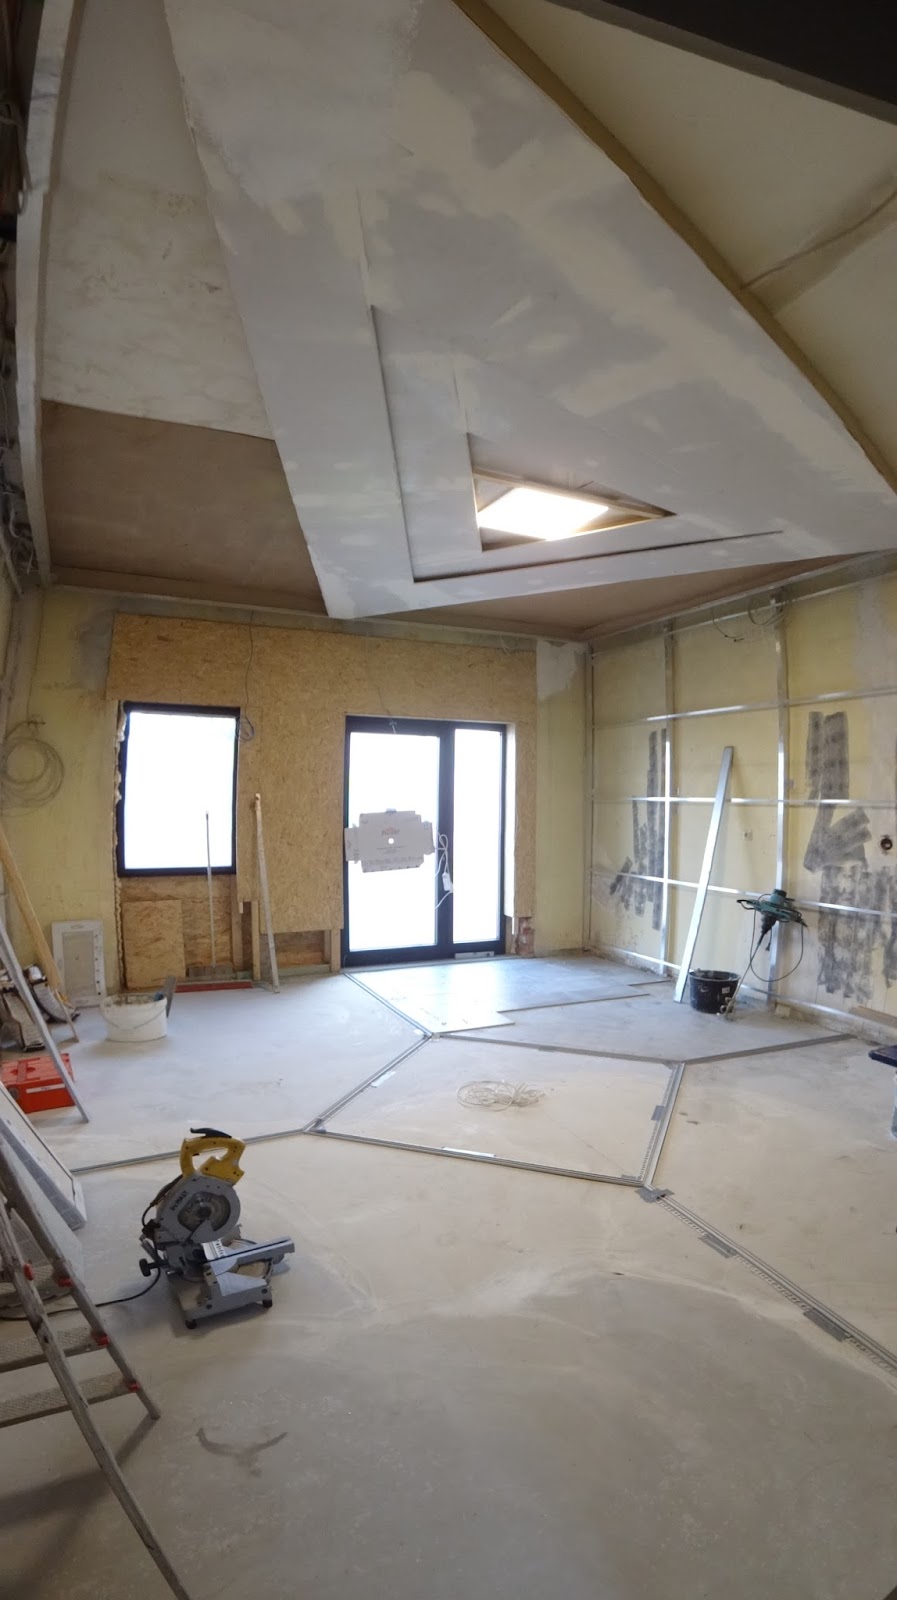
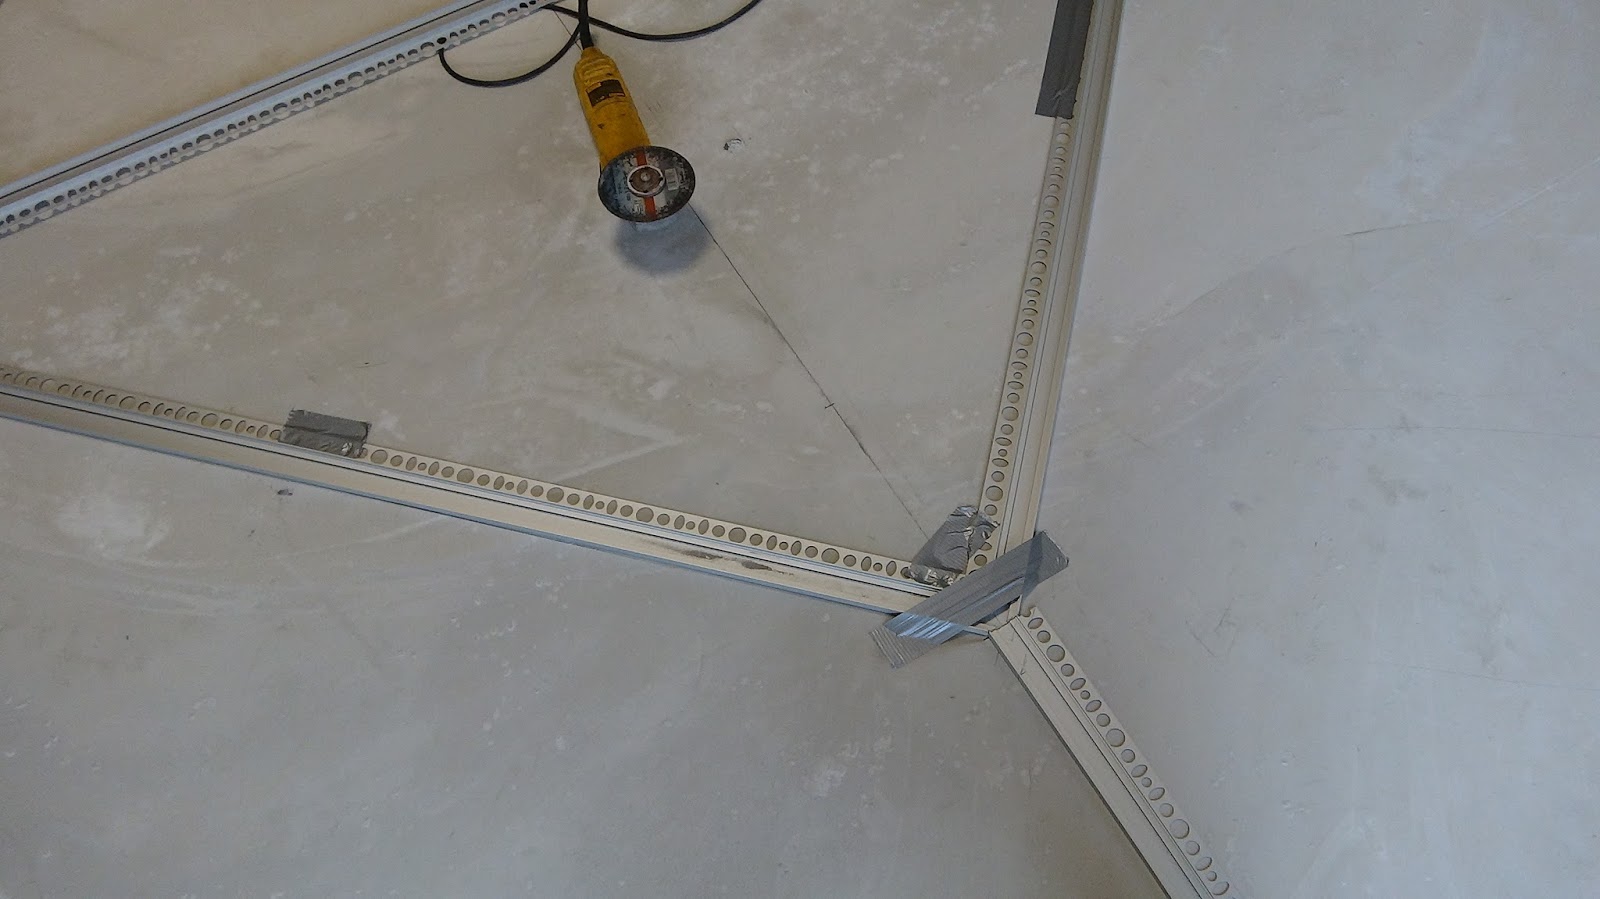
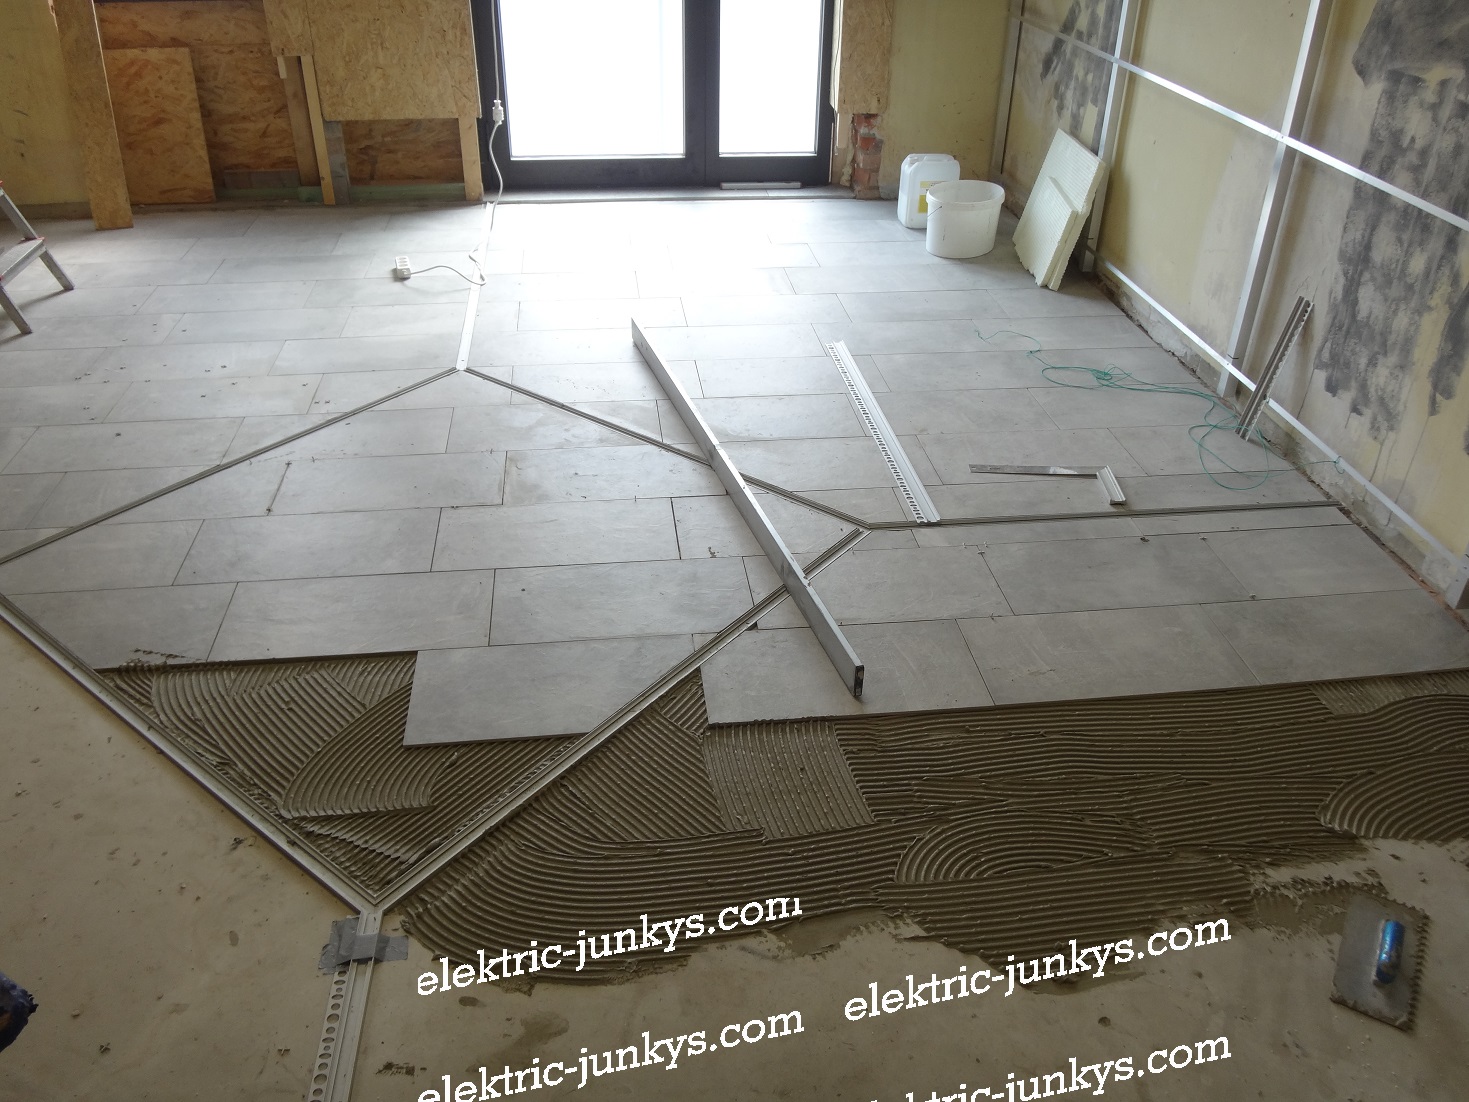
Paste the Tracks down on the floor to get a View mark with a Pen, or just work and fit the Tiles directly to the Alu Bars like we did! (4:10 min)
Step. 4
so let’s mix the tile adhesive with the Mixing Paddle, if you don’t have one you can use your big ladle to mix it, add the water to an bowl then add the powder follow exactly in this direction FIRST THE WATER THEN THE POWDER !
Use the Tooth Spatula to apply the adhesive to the Floor (4:12 min)
Step. 5
Apply
the Adhesive to an area of about "a little more" than 3 full tiles. !
Add one tile after the other, relaxx, slowly Think-look-Check, don´t forget the
Tile Crosses to hold the Symmetric Line and straightness, depending on
your wanted interstice, you need to use specific Tile crosses or wood spares of
1-2-3-4-5mm Based on your Wishes .!
Pat the Tiles carefully down in position "XYZ" all directions use the Spirits level in X and Y direction. After you’ve placed all the Tiles with the Tracks let it rest again for at least 24hrs.
Step. 6
After your Floor is completely dried out and you can walk on it, Best case 48hrs at least, i was walking on it after 12hrs already but it’s not to recommend ;)
We can Start with the tiles grouting Process, follow our Best Grouting Tips for floor Tiling,
How to Grout Tiles?
Pretty Easy just mix the Tile Grouting Material with water "again > first add the Water to a Bowl then add the Tile Grouting Powder to it and Mix it with your mixing Paddle machine. !
Make sure the mixture have the consistence of a Potato Purée or mash.
Massage it well-fed into the tile joints!
Step. 7
Now we are coming to LED Lightning Section.:
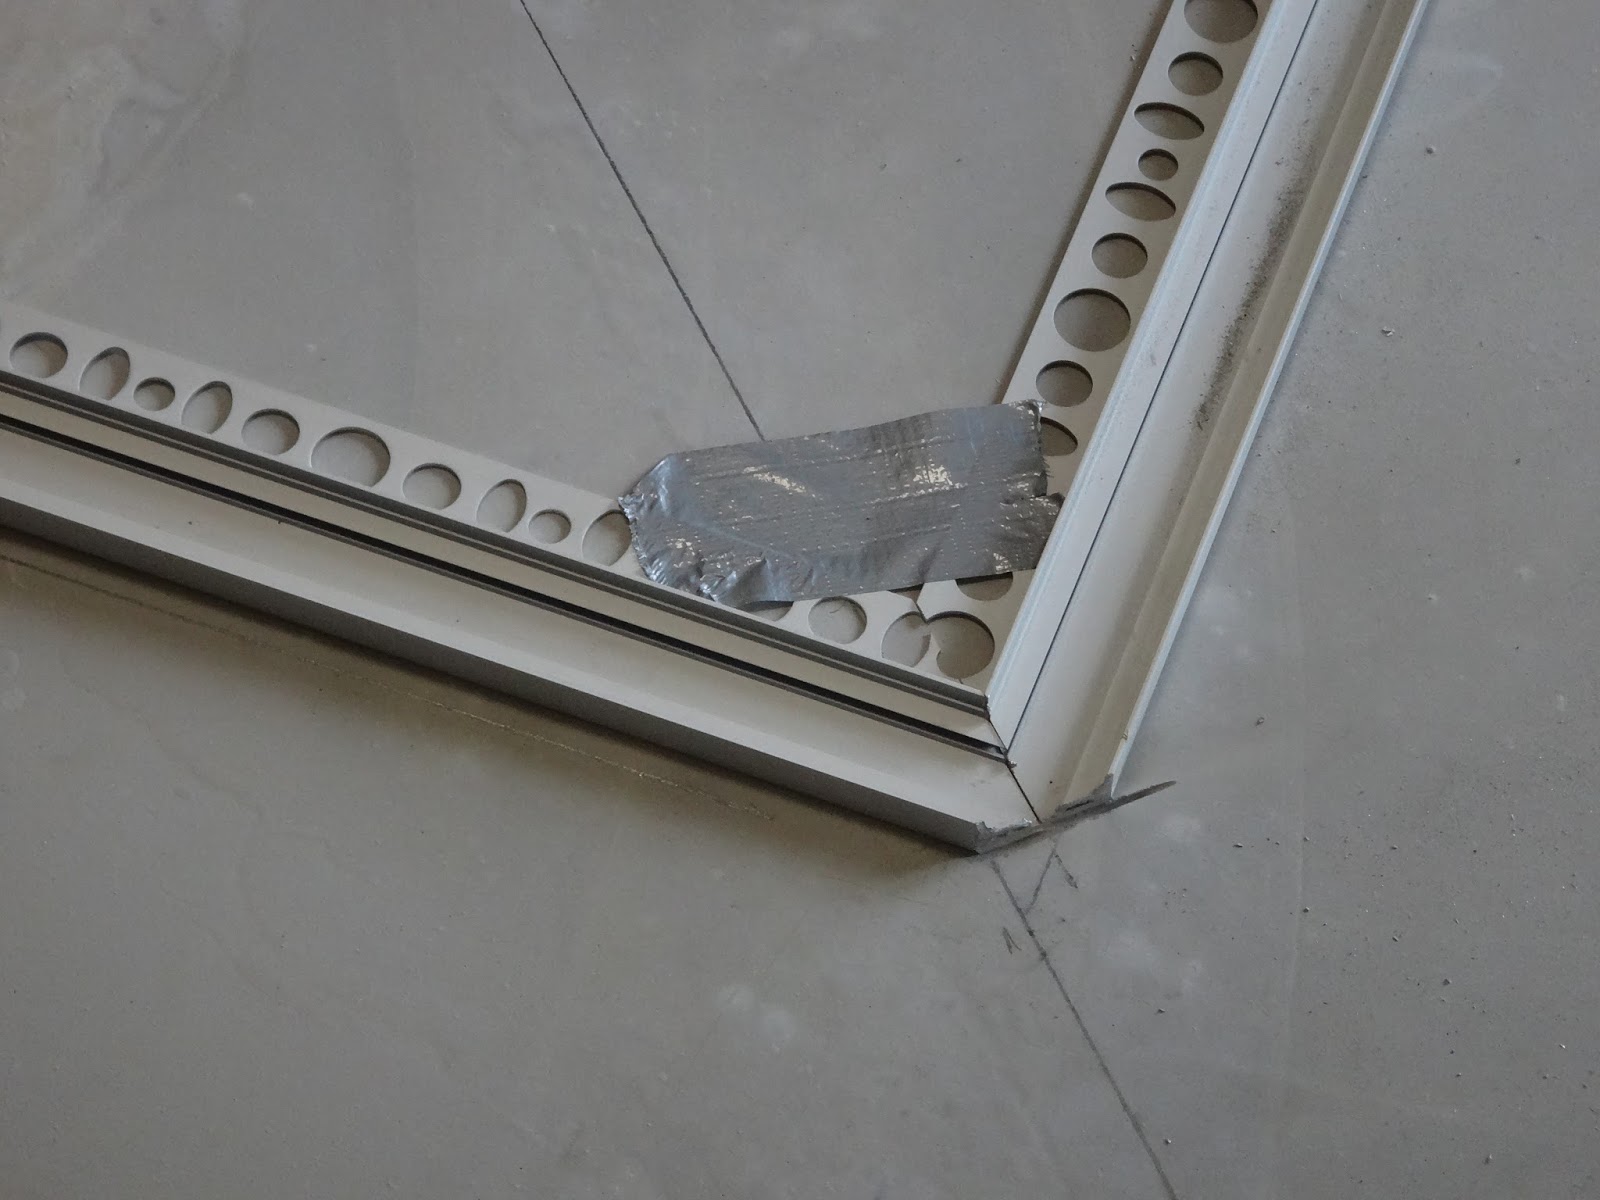
After you placed all your Tiles and Alutracks in Position clean out the Tracks remove all irregularities.
Use Double sided Self-adhesive Tape from elektric-junkys.com, or buy LED Strips from us which have the Adhesive already on the LED Lights Assembled.. Please check that before!
So Let´s Think again ... "LED Variation, and formation" Power consumption, Power Placement Area, Controller Placement area!
We were using about 4PCS > 3 Meters lines as you can see in the Video
There are no products to list in this category.